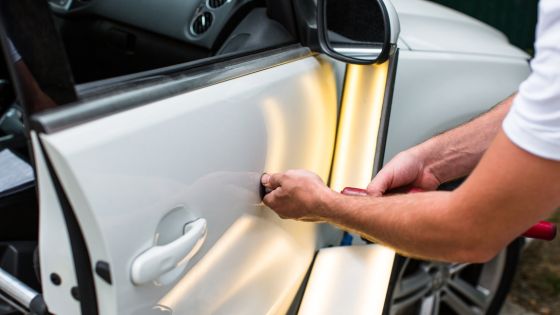
Having a dent on your beloved car can be frustrating and disheartening, especially when it affects the overall appearance of your vehicle. While professional auto dent repair services can be expensive, there are ways you can achieve a professional finish on your own. You can restore your car’s exterior to its former glory with the right tools and techniques. In this article, we will explore the world of DIY auto dent repair, focusing on the effective use of a car dent remover kit, car dent puller, and other essential tips and tricks to help you achieve outstanding results.

Understanding the Basics of Auto Dent Repair
Before delving into DIY techniques, it’s important to have a basic understanding of auto dent repair. Dents are typically caused by various factors, such as minor collisions, hailstorms, or even accidental bumps against objects. While some dents may be superficial and easily fixable, others might require professional assistance. By assessing the dent’s size, depth, and location, you can determine whether it’s a good candidate for DIY repair.
Investing in a Car Dent Remover Kit
A car dent remover kit is one of the essential tools for DIY auto dent repair. These kits typically include various tools designed to help you remove dents effectively. When choosing a car dent remover kit, look for one that contains items such as glue tabs, a glue gun, a pulling bridge, a knockdown tool, and a dent puller. These tools are designed to make dent removal more manageable and yield professional-looking results.
Step-by-Step Guide to Using a Car Dent Puller
Using a car dent puller can be an effective way to remove dents from your vehicle’s body. Follow these steps for optimal results:
● Step 1: Clean the Area – Before starting the repair process, thoroughly clean the affected area with mild soap and water. This will remove any dirt or debris that might interfere with the dent repair.
● Step 2: Apply Hot Glue – Heat the glue gun and apply hot glue to one of the glue tabs provided in the kit. Press the tab firmly onto the dent, ensuring it adheres securely.
● Step 3: Attach the Pulling Bridge – Once the glue has dried, attach the pulling bridge to the glue tab. The pulling bridge provides a stable base for pulling out the dent.
● Step 4: Pull the Dent – Use the dent puller in the kit to apply gradual pressure while pulling the dent outward. Be patient and follow the instructions provided with your specific dent puller.
● Step 5: Release the Glue – After successfully pulling out the dent, apply rubbing alcohol to the glue tab and gently twist it to release the adhesive. This will detach the glue tab from the vehicle’s body without causing any damage.
Additional Tips and Tricks for a Professional Finish
● Use a knockdown tool: A knockdown tool, included in most car dent remover kits, can help smooth out any high spots or unevenness in the repaired area, ensuring a seamless finish.
● Apply heat: For dents on plastic bumpers, carefully applying heat using a heat gun or hairdryer can make the plastic more flexible, allowing you to manipulate and remove the dent easily.
● Take your time: Patience is key when it comes to DIY dent repair. Rushing the process can lead to subpar results. Take your time, follow the instructions, and gradually adjust until you achieve the desired outcome.
● Practice on smaller dents first: If you’re new to DIY dent repair, starting with smaller dents is a good idea. This will give you an opportunity to practice your technique and gain confidence before tackling larger dents and more challenging repairs.
● Seek guidance from tutorials and online resources: Numerous video tutorials and online resources are available that provide step-by-step guidance on DIY dent repair. Take advantage of these resources to learn new techniques, gain insights from experienced DIY enthusiasts, and refine your skills.
● Be mindful of paint damage: When using a car dent puller or any other dent removal method, avoid damaging the paint surrounding the dent. Scratches or chipped paint can detract from the overall appearance of your car. If the dent has caused paint damage, consider consulting a professional or researching touch-up paint options to ensure a seamless repair.
● Assess the limitations of DIY repairs: While many dents can be successfully repaired using DIY methods, it’s important to recognize them. Complex or extensive damage, such as deep creases or large dents, may require professional intervention. Knowing when to seek professional help can save you time, effort, and potential frustration.
● Protect yourself and your vehicle: Prioritize your safety during the repair process. Wear protective gloves, safety glasses, and appropriate clothing to prevent injury. Additionally, use caution when applying heat or working with tools to avoid causing further damage to your vehicle.
● Practice preventive measures: After successfully repairing a dent, take proactive steps to prevent future damage. Park your vehicle safely away from potential hazards, such as crowded parking lots or low-hanging branches. Regularly wash and wax your car to maintain its protective coating and minimize the risk of dents caused by debris or harsh weather conditions.
Conclusion
DIY auto dent repair can be a rewarding and cost-effective way to restore your vehicle’s exterior. You can achieve professional-looking results by utilizing a car dent remover kit, including a car dent puller, and following the tips and tricks outlined in this article. Remember to exercise patience, practice on smaller dents first, and seek guidance from tutorials and online resources. However, it’s essential to recognize the limitations of DIY repairs and seek professional assistance when needed. With the right tools, techniques, and attention to detail, you can transform your car’s appearance and enjoy the satisfaction of a job well done.
